Tools needed: 3/8 Ratchet, 3/8 Standard Sockets, 1/4 Ratchet, 1/4 metric sockets, Screwdriver, Awl, Hand Grinder, Drill bits, Drill, Hole saw- 2 1/2, Cut off wheel or metal saw blade, Utility knife or razor blade, Thread Lock, Plyers or Vise Grips, Work Gloves, Eye Protection, Good light source. Some welding is involved with this installation. * JB weld is not provided with this kit; it is recommended for use.
Please read all instructions first so you will know what will need to be done and what tools you will need to perform this installation.
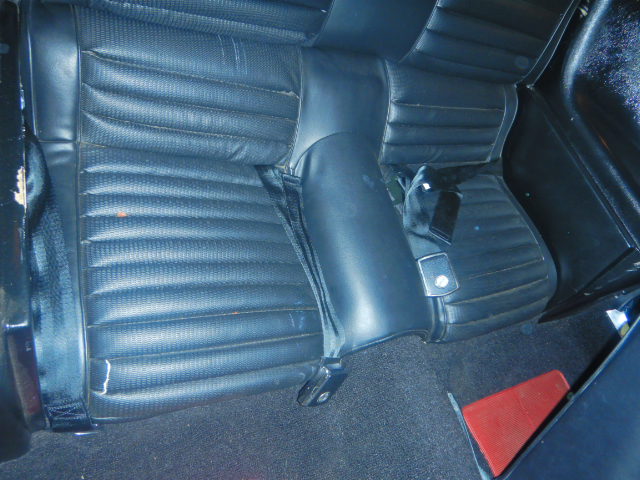
Step 1: Remove the rear seat base portion so you can get access to the bolts that hold on the quarter panel covers for the interior. There is a bolt under the rear cover behind the seat, so remove that to get access to the bolt at bottom of the panel. (Fold down rear seat version)
Step 2: Remove your interior quarter trim panel on both sides of the car.

Step 3: Remove the quarter vents from both sides of the car by removing the 4 mounting nuts on interior side.
Step 4: Remove the vent blanks from the vent housing by removing the pressure nuts that hold on the blank to the small tips on the vent housing. TIP: Keep the blanks, other owners are still looking for these blanks and they can be hard to find, you could sell these blanks.
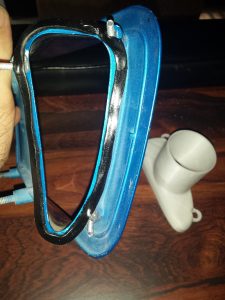
Step 5: Clean the vent body of any tacky butyl tape that may remain after removing the blank.
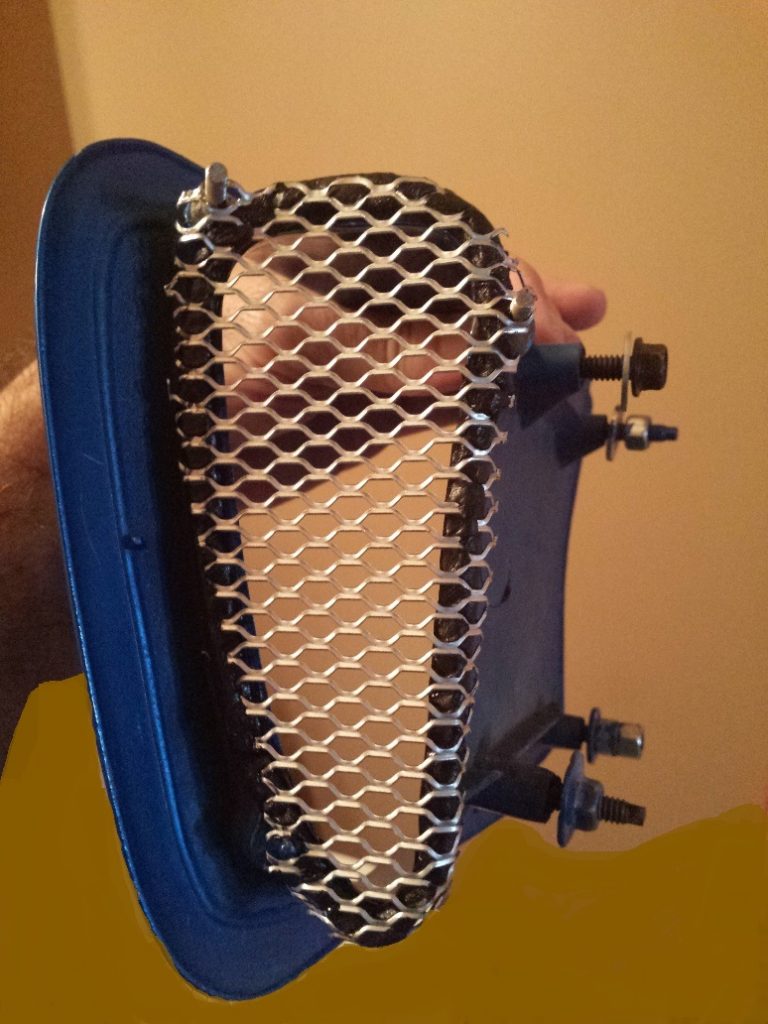
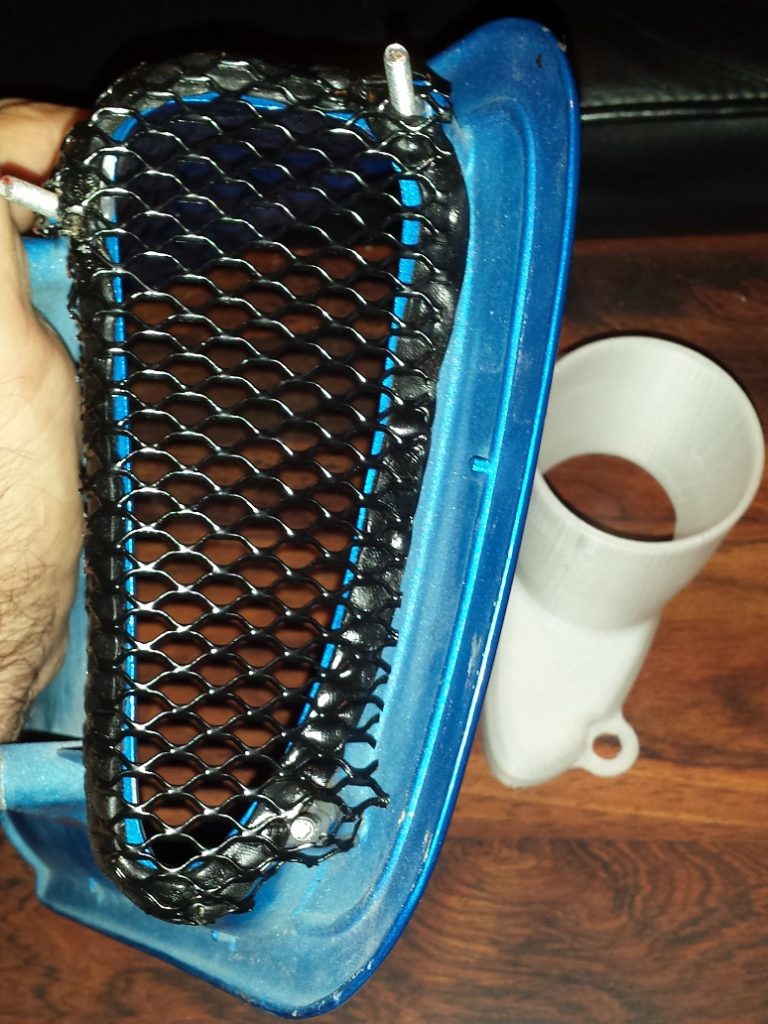
Step 6: Take the vent opening screen and place it over the vent opening so it is straight and even. Use a wooden dowel or the back side of a screwdriver handle to bend the edges of the screen around the sides of the vent body. Use the tips on the vent body to index the screen. Don’t worry the tips will be cut off later in another step.
Step 7: Remove the screen and set aside. You will reinstall later in another step.
Step 8: Cut off the tips from the vent body using an air powered or electric cut off tool or a hand saw with a metal cutting saw blade on it.
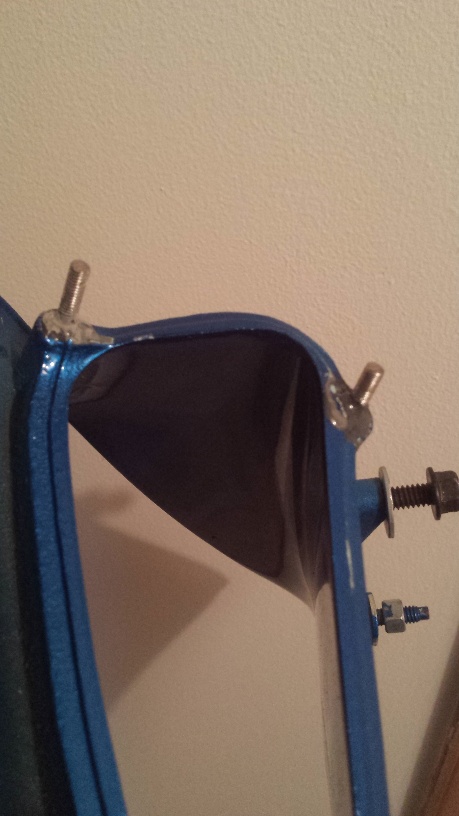
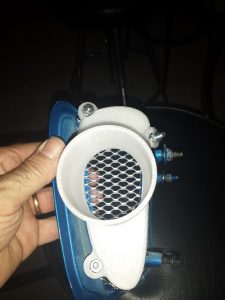
Step 9: Take the scoop and align it over the vent housing where the ears for the scoop will be located at the old tip locations. Use a marker to mark the center of the ear holes. Then use a drill bit that is just larger than the stud that will be used. Drill the holes into the vent body. Drill the hole down approximately 1/8th of an inch into the vent body. Drill the holes at the same angle that the old tips were angled. Don’t try to straighten the studs with drilling because the scoop ears are set to the proper angle for the studs. If you see small gaps between the scoop housing and the vent that is ok, the butyl will fill in these and seal the connection.
Step 10: Use an adhesive like JB Weld (recommended) or something like it to hold the studs into the vent body. Allow the adhesive to dry overnight. Leave enough stud exposed outside of the vent to mount the screen and scoop. This would be approx. 1/4 inch, you can cut the stud later if they are too long when trying to mount the vent scoop to the car. You should dry fit the vent and scoop to each other to perfect the fit of the scoop and vent assembly to each other and to the car.
Step 11: Now that the studs are dry and secure, you can install the butyl tape around the scoop housing. Make sure the scoop housing is clean of any dirt or dust. Start the butyl at the top middle and work your way around the opening. Place the butyl in front of the studs but far enough to the outside of the opening so the butyl won’t squeeze out and show on the inside of the opening when the screen and vent is installed. You can adjust the butyl as needed if you don’t get it the first time.
Step 12: Lay the vent screen over the opening to fit over the studs. You may have to open the screen a little to let the stud come through the screen opening. The screen should fit easily and straight because of the alignment you did earlier in step 6. If you are satisfied with the alignment then press the screen into the butyl tape by pressing on the edge portion of the screen, not the center, you can dent the screen. Press down over top of the butyl.
Step 13: Take another piece of the butyl and do the same as in step 11. Install this on top of the screen, this is where the scoop will sit. Press the scoop into place and see if the butyl squeezes out toward the inside of the scoop. It is ok if the butyl squeezes in towards the vent screen, as long as it is satisfactory to you, it will work, it is about sealing the connection.
Step 14: Install the washer and star nut onto the studs and tighten the nuts. Don’t overtighten the nuts, these are just to make sure the scoop gets secured and won’t move around when installed. The ears for the scoop are already angled to the vent, so don’t try to bend the ears, they may break off. TIP: Use a plumbing pipe plug (2-2 1/2in dia) that will seal the scoop opening at the hose connection and then fill the vent with water for a few minutes to ensure the vent/scoop connection won’t leak any water when you have everything assembled.
Step 15: Now you need to remove the studs that mount the vent body to the quarter panel so you can mount the vent and the scoop assembly all at the same time. Use vise grips or two nuts on each stud to remove them. You can purchase a set of the studs and nuts from a mustang parts distributor. The kit to order would be for the rear extension mounting studs and nuts, they fit perfect for replacement of your old studs if they are damaged or stripped during removal.
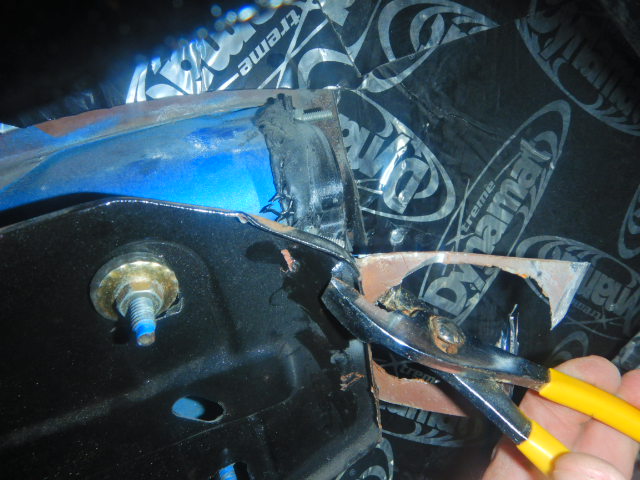
Step 16: Now is time to cut the back brace for the vent mounting bracket to use it for extra support for the scoop when it is installed. Make sure to cut the outer portion of the brace at the quarter panel side. Cut the quarter panel side and bend the brace inwards toward the interior of the car. You may need a pair of plyers or vise grips to help you bend the metal inwards. If you find that the top inside stud hits the top corner of the mounting bracket, you can slightly bend the bracket in at the corner, don’t bend it too much, you only need a small amount of room.
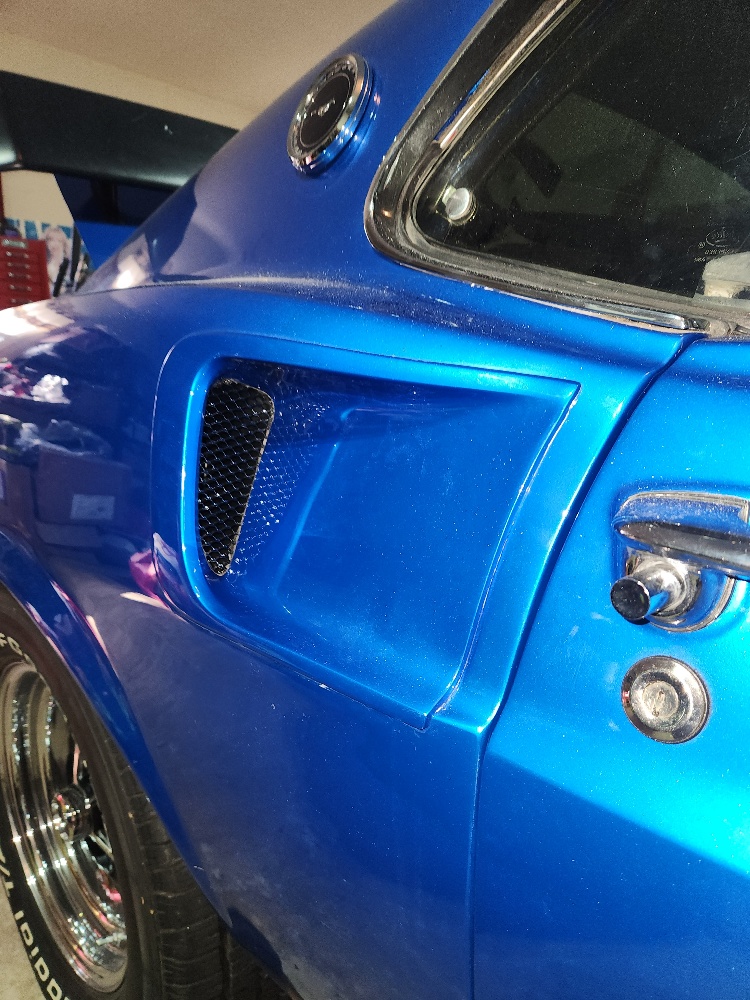
Step 17: Clean the vent housing and the body line where the vent will mount of any dirt or dust. Install butyl tape onto the vent at the edge so it will be sealed to the car body once it is mounted permanently. When you have aligned the vent body straight into the opening then press it into place. If any butyl squeezes out, you can remove it with a plastic or wooden tool, so you don’t scratch your paint. Now install the mounting studs back into the vent on the inside of the car to hold the vent/scoop assembly into place and tighten the nuts. TIP: use a mild thread lock to help hold the studs into place and prevent them from backing out. TIP: When the vent/scoop assembly is installed, it is recommended that you do a water test on the vent body exterior to ensure the housing will not leak when you wash the car or if it rains.

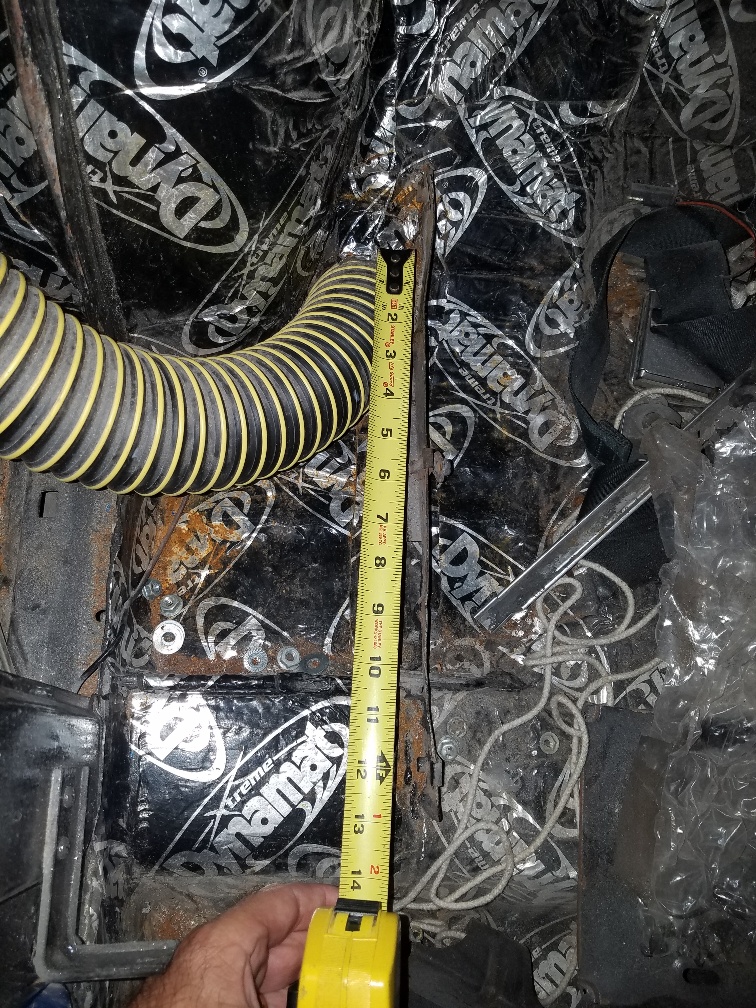
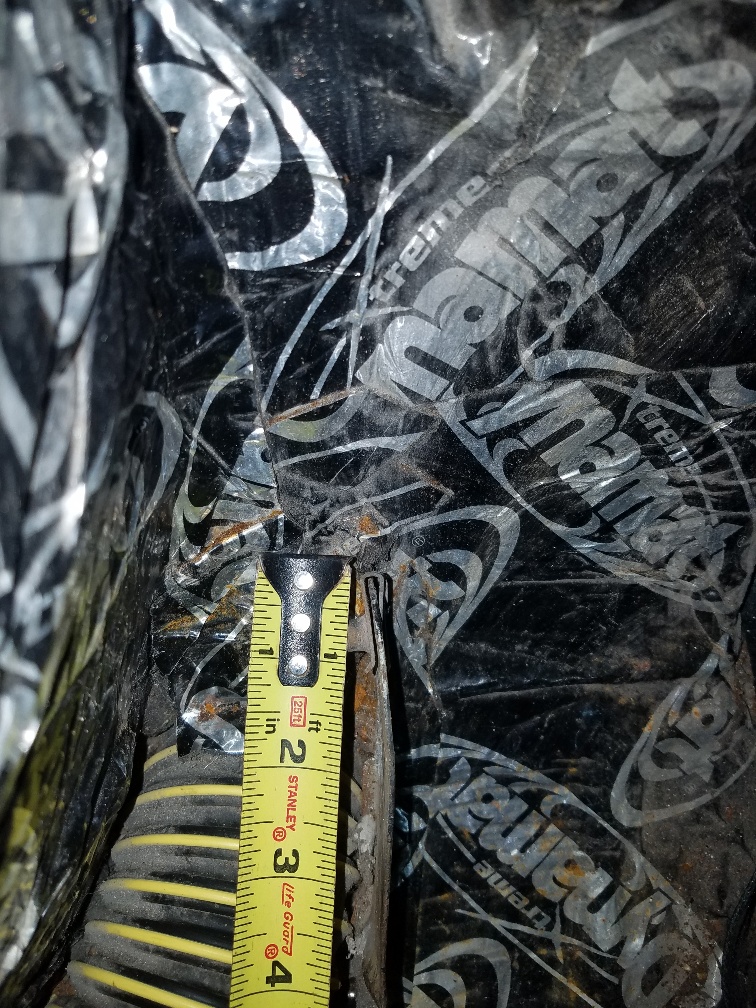
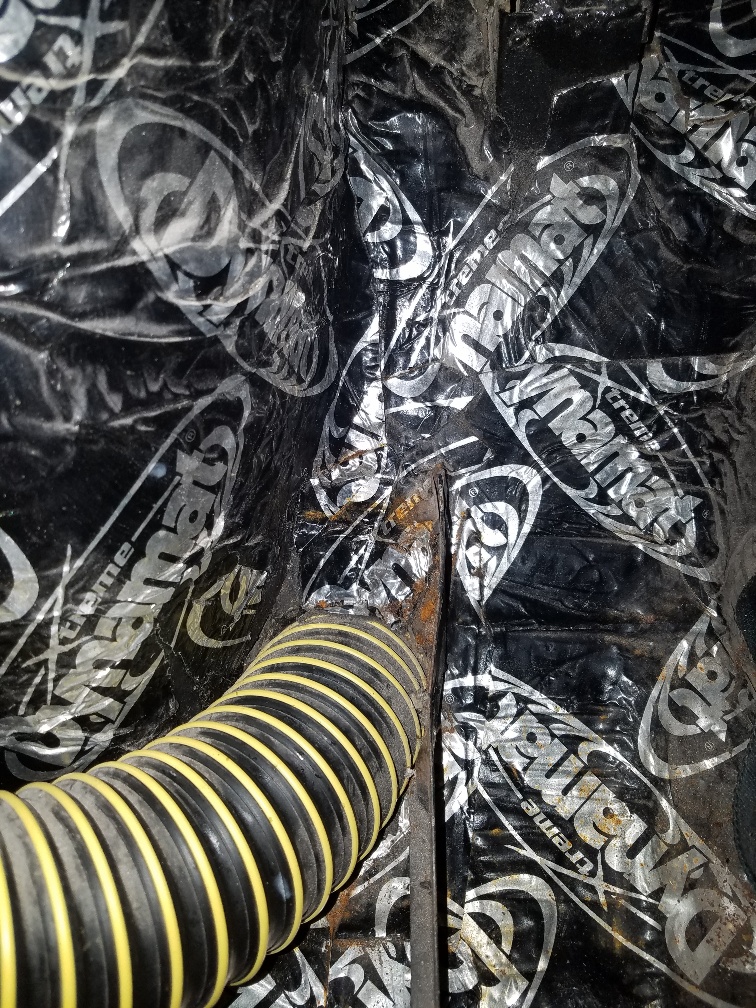
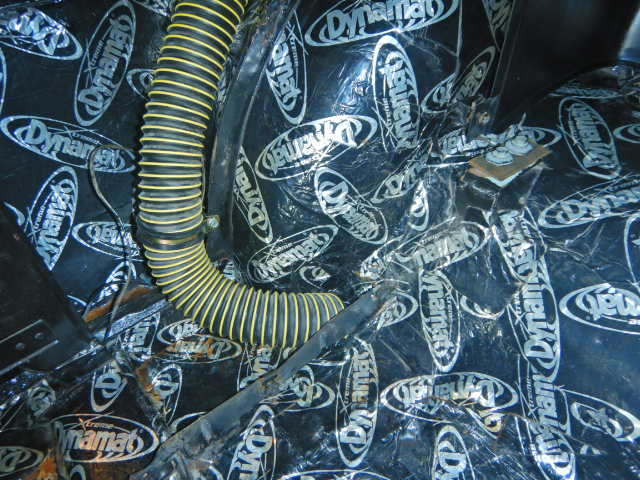
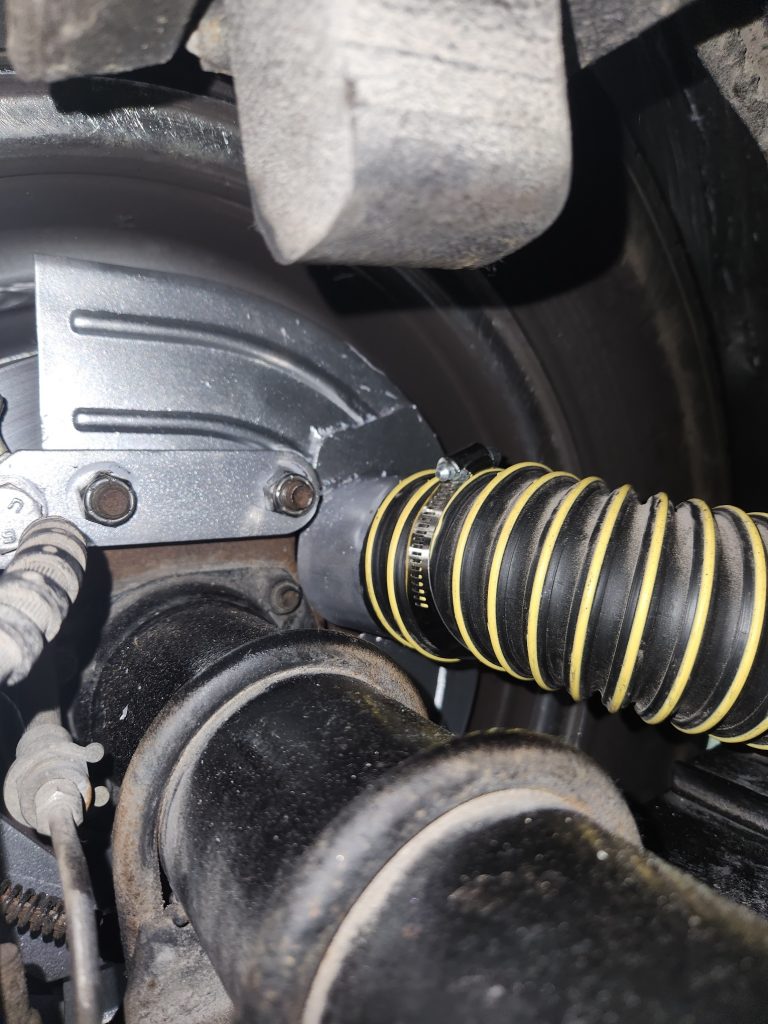
Step 18: Now it is time to install the 2 1/2-inch hose onto the scoop and cut the hole in the floorboard to route the hose out to the back brakes or rear axle. The hose comes as a full length of 11 feet, you should cut the hose in half (5 1/2ft) to make it easier to install. Using 2 of the provided hose clamps, use one to secure the hose onto the scoop and the other to secure the scoop to the bracket brace that was cut earlier and bent inwards. You can trim the brace as you need to make the clamp fit as you like. (your brace will not be cut like this one, this is due to the first type of scoops that were made and used the back brace as a support). Use the quarter panel mounting bracket on the floor as a guide and drill a hole between the rear tire wheel well and the interior quarter panel mounting bracket. Use a hole saw (2 1/2) and drill a hole at this location (approx. 13 inches from the front and 2 inches from the back of the brace is where the top of the hole will be located). Use a die grinder to widen the hole as needed. You will route the hose through this opening, (Be careful as not to tear the hose, the metal will be sharp) take enough hose so it will go back far enough to the rear brakes, cut off any extra length of hose as needed. Remember to leave some slack in the hose to allow it to mover with the rear end. You will use butyl tape around the floor opening on both sides of the floor to seal the hose to the floor, so water or air doesn’t leak into the car.
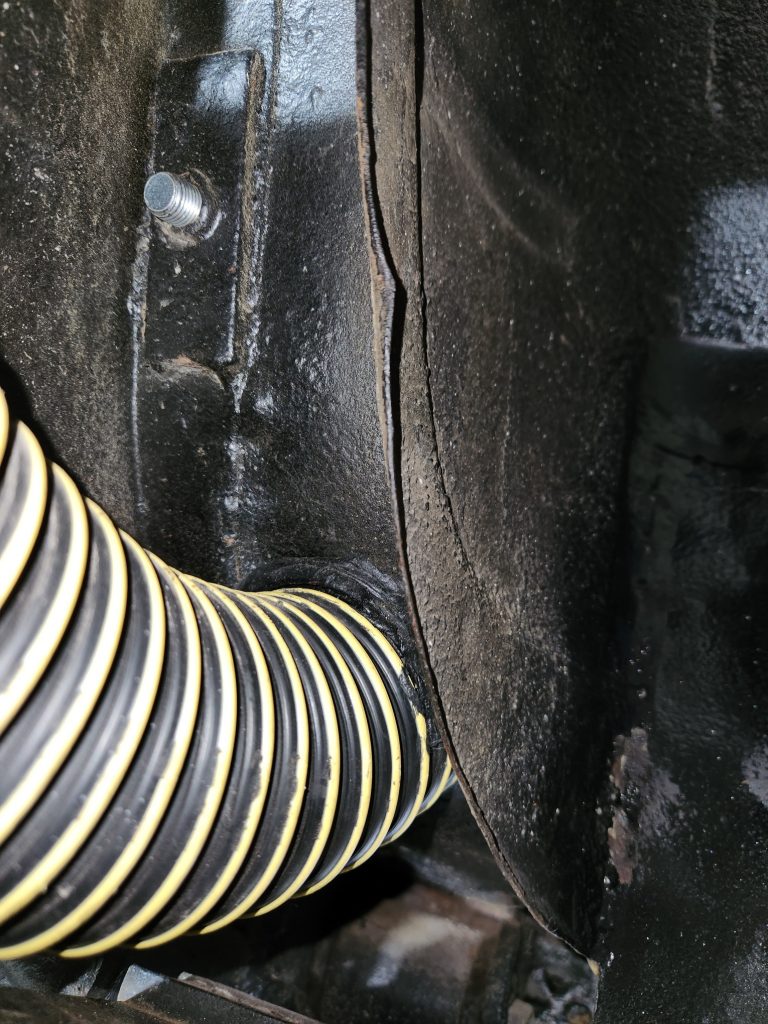
Step 19: Use one of the offset hose loop clamps to mount the hose to the wheel well lip, you may have to drill a pilot hole at the mounting location (self-tapping screw is provided with the clamp). This is so the hose won’t flop around or shake while driving and hit the quarter panel or interior quarter trim panel.
Step 21: Make sure all nuts, clamps, screws/bolts are tight, and all connections sealed watertight. You have now successfully installed your quarter panel vent upgrade.
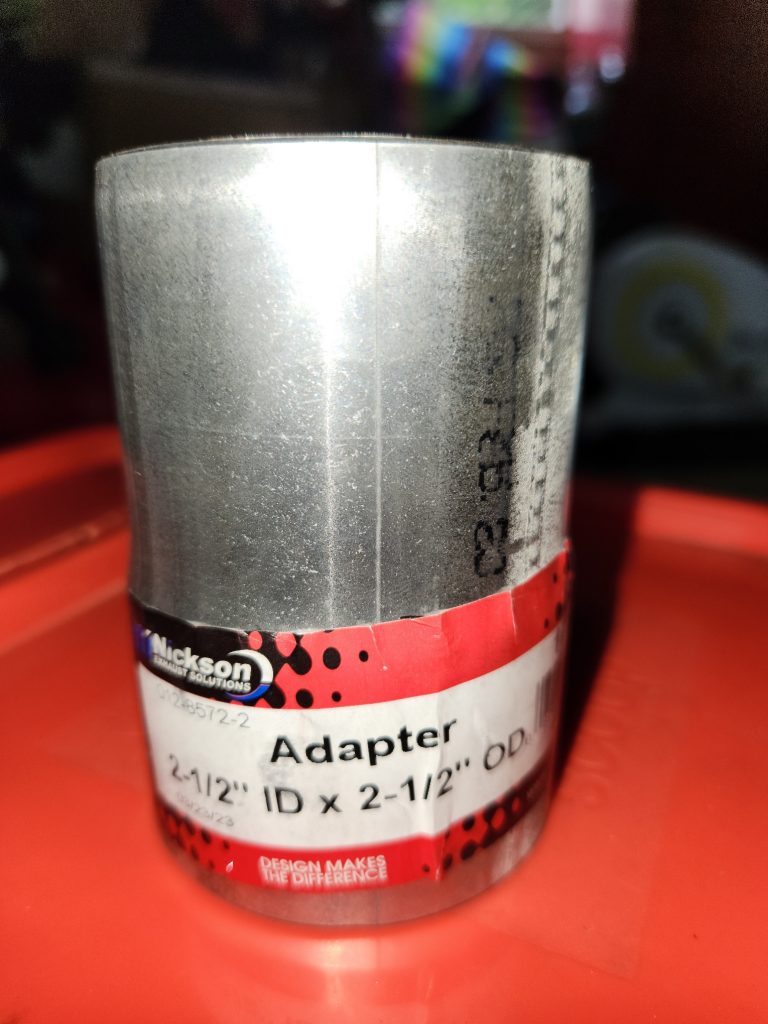
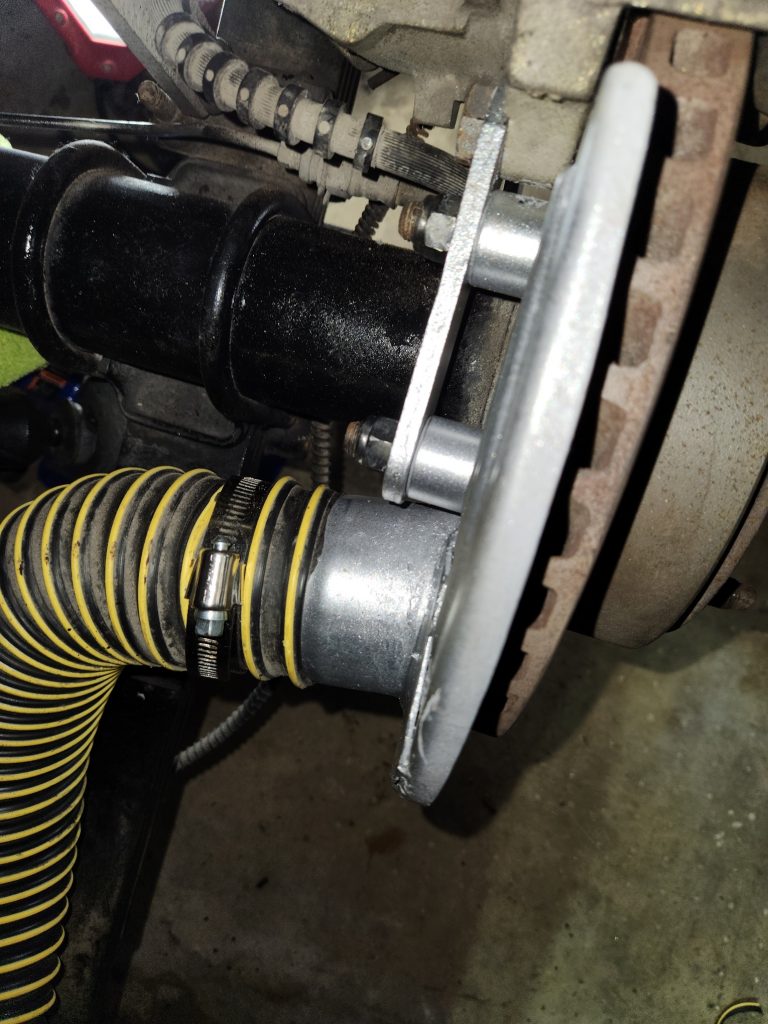
Step 22: Now to attach the hose to the rear brakes or the rear-end. This will be different for owners that haven’t converted over to disk brakes yet. There are a lot of mounting brackets for hoses online that can be used to attach the hose to your disk’s brakes. If you have converted the brakes to disk, then you can use the existing backing plate for the rotor to install the 2 1/2 adapter fitting (Not provided). You will have to measure the for the adapter location and trace a circle around the adapter onto the backing plate so the metal can be cut out. This step may take time to make sure you get the proper mounting location set. This is where you will weld the adapter onto the backing plate, make sure the inside diameter side of the adapter is flush with the backing plate and not sticking through as to hit the rotor. Using another piece of metal, you should trim it to fit around the adapter and weld it to support around the adapter where it attaches to the backing plate TIP: Angle the adapter slightly towards the front of the car so the hose won’t cause extra pressure on the adapter and backing plate. Depending on the brake system you install may determine where the hose would be mounted to the dust plate.
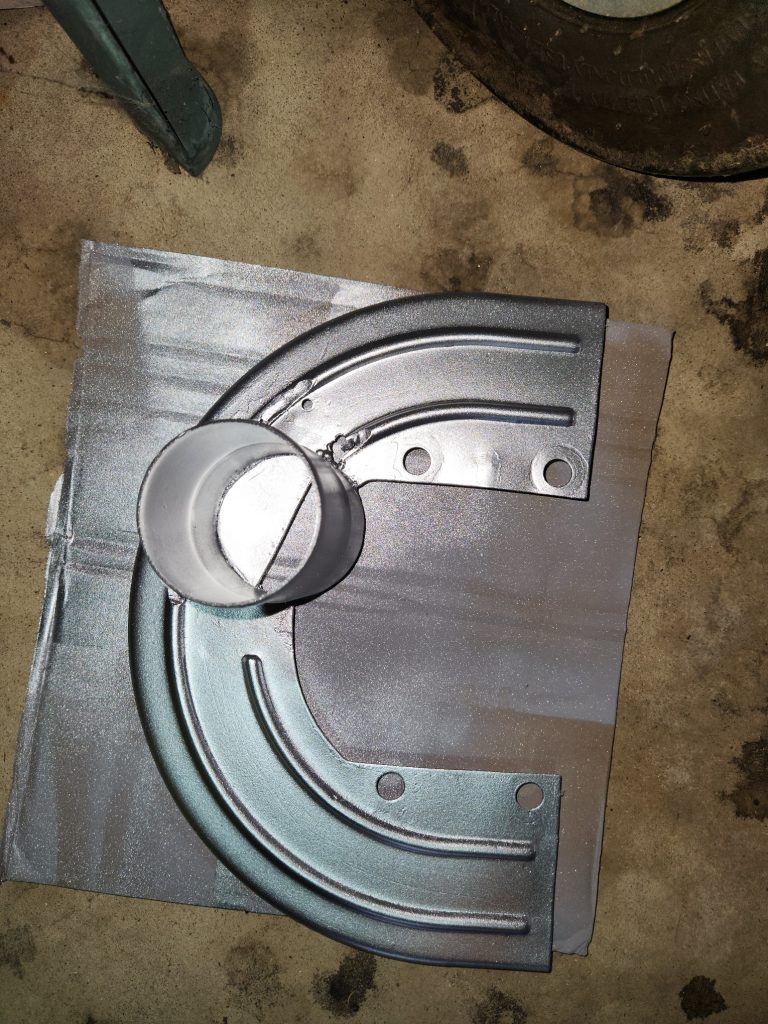
Tip: You will want to install (weld) a half blank piece into the adapter to make the air go towards the inner portion of the rotor, don’t have the air just blow on the rotor, it won’t cool the rotor as well and you could warp the rotor.
If you want to use the hose to cool the rear end housing, then the connection is up to you on how you want to make that happen. If you are comfortable with doing this type of work then you can fabricate a mounting bracket to make it work, Good Luck and enjoy your Mach 1 to the fullest.